Correct installation of Windows XP. Step-by-step instructions for installing Windows XP Start installing windows xp from the disk
Every day computer technology is developing more and more, as is the software for it. But today, many are left with computers that do not meet the stated technical requirements. An example of such software is Windows 7, which requires at least 1 GB of RAM for comfortable operation.
What should those who have only 512 MB of memory do? In this case, our good old friend Windows Xp comes to our aid. In this article you will learn how to install Windows Xp. This operating system is the second most popular in the Microsoft line. But this is not even strange, because the quality and ease of operation were and are at their best.
Let's compare Xp with its older brother Windows Vista; somehow this OS did not catch on with us, since it had many shortcomings. And this was proven by the same users who worked on XP without switching to a new OS. And most people, having bought a laptop or computer with Vista, eventually switched to XP or Windows 7.
If you are ready to learn how to reinstall Windows XP correctly, then move on to our installation, starting with preparing the computer.
Preparing to install Windows Xp
To install, first of all we need an installation CD with Windows xp. Or, as an alternative, it could be a bootable flash drive, from 2GB or more. You can learn how to create a bootable USB flash drive. If your choice fell on a CD, then be sure to read how to burn a disc with a Windows image
Of course, we will need to save all our data to drive “D” in case you reinstall Windows. And you may need it. For example, I have a lot of bookmarks of the pages I liked, and it would be expensive to look for everything again after reinstalling. But having exported, I saved all my favorites in one file, and after installation I restored them in a few clicks, and this is quite convenient.
Having saved all the data, the last step remains, we need to put it in a flash drive. Having done all this, you can proceed to the installation itself.
Installing Windows Xp
Having prepared the computer and set everything in the BIOS as recommended, after inserting the CD into the drive, booting from it should begin. A window will open asking you to press a key to continue the installation. The main thing is to react in time and have time to press, because if there is nothing to do, the computer will start to turn on as always with the previously installed OS.
By pressing any key, a blue screen will appear on which the configuration of your computer will be checked. You'll have to wait a little here.

After checking, the installation program will offer to install a new Windows XP or restore the existing one. Since we will be installing a clean system, click “ Enter».


To install Windows XP, I used a blank disk and created one partition by simply pressing "Enter". But if you want to divide the disk into 2 partitions, click “C” and indicate the size that suits you, for example, 20GB disk “C:\” and confirm. Selecting “Unallocated area” again, press the “C” key and specify the remaining 20GB, thus creating a second logical drive “D:\”.

Having finished allocating free space, select “Format partition in NTFS system<Быстрое>».

The formatting process will begin, it will take a few seconds, although if you chose simple formatting, you will have to wait a little longer.

After formatting, copying of the installation files will automatically begin, again here we don’t need to click anything, we just wait.

After copying all the files, the system will reboot and proceed to the installation itself.

Our computer rebooted and the installation of Windows XP began, with an approximate time until it was completed.

At the 33rd minute, a window will appear to configure regional settings, change the layout and add a language, just click “Next”. This way you will leave the standard set of languages English and Russian. As a rule, I set additional languages after installation.

In the next window we need to specify a Name.


Let's give our computer a name.

Set the time zone and set the date and time.

We select the usual parameters.

We simply skip this step without changing anything.

Attention!!! If you set to boot from a CD drive, then a window will again appear asking you to press a key to boot from the disk. Your task is not to press anything, because Windows XP is almost installed and we won’t need the disk anymore. After the reboot, auto-adjustment of the image will begin, we agree with everything by clicking “OK”.


Windows greets us and thanks you for your choice, proceed to the next step with the “Next” button.

“Delay this action” is what we need to select. In the screenshot I scored to change the choice.

If Windows XP managed to install drivers on the network card and the cable was plugged in, it may begin checking the Internet connection. But we just need to click on “Skip”.

Again, if there is a connection, then Windows will offer to register with Microsoft. Select “No” and click “Next”.

Be sure to enter your name for the account.

Finishing the setup of Windows XP SP 3

Everything is ready Windows Xp is installed.

How to install Windows XP
It is possible that today installing Windows XP will seem like a rather strange decision to someone. Indeed, newer versions of the Windows operating system have been released a long time ago. In addition, Microsoft has already officially announced the end of support for Piggy.
However, in practice, many computers around the world continue to operate successfully on XP. There could be a lot of different reasons for this. There is probably no point in understanding them here. Instead, it’s worth telling how Windows XP is installed from scratch. Moreover, this procedure differs in many respects from that common in modern operating systems.
Windows XP installation options
You can install Windows XP from a variety of sources:
- From the supplied system disk;
- From a bootable flash drive;
- Or even downloading all the necessary files from the network.
There are also several very specific methods, but they are so rarely in demand that they are probably not worth considering here.
What to do first
Not only before installing XP, but also other operating systems, you will need to perform a number of mandatory actions:
- Get an installation disk or an installation flash drive;
- Make backup copies of all your important data: after all, everything that was on the hard drive before will disappear forever;
- Make sure that all the necessary drivers are at hand: XP did not come with ready-made video and sound drivers - so they will have to be installed separately;
- And also set as the boot source the drive that you plan to use: a flash drive, CD drive or other device.
In order to implement the last point, when the computer starts, you will need to go to the BIOS. Typically, this is done by pressing the F12 key, but for certain computer models it may be other keys: refer to the documentation. In the BIOS settings you will need to set the parameter: First Boot Device from CD-ROM, or flash drive, or indicate that the boot will occur from network resources.

Let's start the installation
Once the download source is specified, you will need to insert the system disk, save the changes and restart the computer. If everything was done correctly, the drive will rustle and a prompt will appear on the blue screen to begin installing Windows XP. If you agree, you will need to press F8 to confirm the License Agreement.
Next, a list of available partitions for installation will open. Typically, drive C is selected as the system partition. However, this is not necessary. Some users even install several copies of the OS in different partitions. In short, use the cursor keys to select the partition to be installed and then select the method for formatting this partition. In most cases, “Format with NTFS” is suitable. This is where XP works. You can also select "Quick format with NTFS". In this case, your data will not be destroyed, and the formatting and installation itself will also be faster. However, if the problem loading XP was caused by a problem in the system, or Windows XP was not installed before, this should not be done.
We agree that all data on this partition will be destroyed by pressing the F key, then watch how the progress bar of the formatting process is filled. This process can take quite a long time - it all depends on the speed of the computer and how large your hard drive is.

As soon as formatting is completed, the computer will reboot; at this time you do not need to press any keys. If everything went well, the necessary system files will begin to be copied.
Continue installation
After copying the most important files, Windows will switch to graphical mode. You can read about the advantages of the new Windows in comparison with older versions. As a matter of fact, you won’t have to do anything special at this time. Unless you agree with everything they offer.
Although some actions will still need to be taken. For example, in the first stages you will be asked to enter a license code. If it is not there, the installation will not be able to continue. Therefore, you should take care of the sticker with the code, or write it down somewhere and store it separately.

If the entered code matches the genuine one, the installation will continue. Sometimes the computer will overload, sometimes it will “think” for too long. There is no need to be afraid of this: everything goes on as usual.

But it’s still too early to go on a coffee break. The system, for example, will ask what language we want to set as the main one, and also set the time and date, give the name of the account (it can be changed later), register (or not) on the Microsoft server, update our operating system right now ... In general, all queries are intuitive, so choosing the right answer option is not difficult.

At the final stage, the operating system will inform you that almost everything is ready and will automatically configure the display parameters. However, until the video drivers are installed, the image will still not be of high quality.
Finally, the computer will reboot for the last time, after which the familiar Desktop with a photo of a green hill will appear. You can assume that the installation has completed successfully.

Final stage
At the final stage of installing the OS, you will need to configure the operating system itself to your liking, as well as install all the necessary drivers. How to do this is a topic for another article. As for installing drivers, everything is quite individual, here is just a small list of the most necessary ones:
- Video system driver;
- Sound drivers;
- Network drivers;
- If necessary, you can install drivers for modem, printer and other devices.
As you can see, there is actually nothing particularly complicated in the question of how to install Windows XP. Anyone can do this if they have certain skills.
As everyone knows, to work with a computer we need an operating system, which over time becomes unusable due to viruses, junk and other factors. Many people think that it is better to turn to a professional for reinstallation, but I offer you step-by-step instructions for installing Windows XP. After studying it, you will have no doubt that you can install Windows XP yourself.

Why do you have to reinstall Windows?
According to statistics, even if you have good computer protection from viruses and careful handling, you still have to reinstall Windows xp every three years. The “garbage” that accumulates in the system is sometimes leftovers from the removal of programs and games, which contain settings, configuration files and other system files of the old application. Many programs make entries in the registry, and after deleting the entry remains “live” in the system. It also happens that the computer hangs and there is no way to “revive” it, and the conclusion suggests itself: you need to install a new Windows xp.
Setting up your computer to boot from disk.
Usually, when the computer boots, the motherboard splash screen appears for a moment, then the post is checked, and now we see the “Windows XP” greeting. To install, we do not need to launch Windows itself, but we need to launch a disk with our windows xp image. To do this you need to go to Bios. To enter Bios, you must press the DEL or F1 key when turning on the computer. (On laptops use F1, F2, F3, DEL, Ctrl+Alt+Esc. If more than one combination does not work, then you need to look on the official website for how to enter bios).
Most often there are only two types of bios:

1. Phoenix AwardBIOS.
If you have this particular version, then you need to do the following: enter the Advanced BIOS Features section, select First Boot Device and assign the value CD-ROM. Then press the F10 key (to save the settings and exit) and select Yes in the dialog box that appears.

2. American Megatrends BIOS.
In this version, the background will be gray and the sections will be written in a line at the top. First you need to enter the Boot section, then the Boot Device Priority subsection and in the 1st Boot Device item select your CD-ROM drive. And just like in Phoenix AwardBIOS, press the F10 key and confirm Yes.
This completes the computer setup.

Launch the windows installer.
The first step is to insert the Windows disk into the drive and restart the computer. On the dark screen we will see the inscription “Press any key to boot from CD”, which means press any key to boot the disc, which is what we do. This message is displayed for no more than five seconds, so you need to immediately press any key. If you didn’t have time, you should restart the computer and press the key again.

On the monitor we will see that the Windows installation has started. There is no need to interfere unless you want to install a special RAID or SCSI driver. In this case, you need to press the F6 key.

Next we will be asked:
1. Start installing windows xp (Enter key)
2. Restore Windows (R key)
3. Exit the installer (F3 key)

We press Enter and the license agreement appears; to agree and continue the installation, press F8. Next, you need to select the hard drive partition on which the installation will be performed. If the disk is new and there is only an unallocated area on it, you need to create a partition (C key), specify the required size in it.

We will also be offered quick and regular formatting of the hard drive. Formatting is best done as usual with the ntfs file system. After all, the long-awaited installation of windows xp will finally begin; upon completion, the computer will reboot itself and a window will appear with the inscription “Press any key to boot from CD”, this time we are not pressing anything!

A window like this will appear in which you don’t need to change anything, but in the next one, be sure to enter the Name and Organization.
Friends, with this article we are opening a new section dedicated to how to work with a computer correctly. We will cover such issues as installing Windows XP correctly, as well as updating drivers and other programs for everyday use.
Many will say: “ What should I put there? Is everything simple there?" Do you know that incorrect installation of the OS in most cases is the main cause of malfunctions when working on a computer, ranging from banal freezing and braking to errors at the hardware level.
How you install the operating system on your computer will determine how well it will serve you. So, let's figure out how to install Windows XP correctly.
We analyzed enough material on the Internet on this topic, but we did not find a simple and adequate discussion of the topic. Also, to simplify perception and better understand the OS installation process, a video story with a detailed description was prepared.
No attention was paid to such trifles as “buying a disk with an operating system” or “whether you need to read the license agreement.” We paid special attention to the initial setup of the installed system.
Basic steps to install Windows XP
- 1. The first thing you need to do is change the boot order in the BIOS to “boot from optical disk”. To do this, when loading the OS, you need to click “ F2”, or “ DEL”, and go to the “ tab BOOT", where by pressing the " key + " or " — ”, edit the boot order so that the entry “ CD-Rom Drive” was at the very top.

- 2. Save the settings by pressing the “ key F10" When you restart your computer, the message “ Press any key to boot from CD..”, you must press any key to start booting from the installation disk.
- 3. Next, preparations for installing the operating system will begin. When the welcome window appears, the system will once again ask you to confirm your intention to install a new OS, press the “Enter” key.
- 4. When the license agreement appears, click “ F8” to accept it and continue with the installation.
- 5. If you reinstall the OS, the installer will try to restore the installed version. We don’t need this, press “Esc”.
- 6. Next, perhaps, the most important thing. Selecting a partition for installation. If your hard drive is already a priori divided into logical partitions: system and one or more user ones, then this is very good. Then you will only need to delete the system partition, then create it, format it and install a new OS on it.

If your hard drive has not been divided before, then this must be done now. For what? Everything is very simple. By dividing the hard drive into a system part and a user part, you create a safety net for yourself. if the OS fails in the worst case, you will simply reinstall the OS on the formatted system partition, but your user data will remain safe on the user partition.
How to properly divide a hard drive, watch the video. As an example, the video lesson looked at a 10 GB hard drive. If your hard drive allows it, make the system partition at least 20 GB.
- 7. Next, you need to format the partition with the NTFS file system type. Select Quick Format.
- 8. The system will reboot, take advantage of the opportunity and restore booting from the hard drive in the BIOS settings, and not from the CD-Rom. We have already looked at how to do this in the very first steps.
- 9. After rebooting, the system will continue with the installation. The first window that appears will be “ Regional settings window”, where you need to select the keyboard layout.
- 10. Next, the installer will ask you to enter the Name and organization name. Enter only the Name and click next.
- 11. In the window that appears, enter the product license key. Be careful.
- 12. Set the Computer name. Leave the administrator password field blank for now.

Make the necessary date and time settings. One thing is true: at the moment, we have legally abolished the transition to winter time. I advise you to install the appropriate update from the official Microsoft website (WindowsXP-KB2570791-x86-RUS). This can be done after installing the OS.
- 13. Next, you need to determine whether the computer will work on a domain network or not. We don’t change anything, click “ Further" We wait until the installation program finishes its work and reboots.

- 14. When you first start, the system will try to automatically adjust the screen extension. accept them if you are satisfied with the selected option. When the welcome window appears, click “ Further”, we put off the automatic update settings, we skip the Internet settings, we put off registering with Microsoft.
- 15. Create an account.
- 16. Initial OS setup is mandatory. Watch the video and follow everything step by step. After completing all the settings, you will receive an optimally configured computer ready for work.
Video “how to install Windows XP correctly”
We watch the video and learn. If something is not clear, ask questions.
A fairly convenient option when loading Windows XP onto a device is to use a special flash drive. Here the WinToFlash program will provide the necessary assistance. When it starts for the first time, you must agree to the user agreement and click OK. Next, the main application window appears, which looks like this.
Since the program is completely translated into Russian, the process of working with it is significantly simplified. To create a bootable USB flash drive, you must use the wizard. It involves support at all stages of this process. There is another approach to accomplishing the task. To do this, open the “Advanced Mode” tab and click on “Transfer Windows XP Setup to a Drive.” You should select the appropriate drive if it is not specified. After this, click the “Create” button.

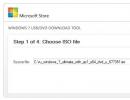
Now you need to set the location of the Windows XP files. There are various options - they can be located on a hard drive, a CD, or as an image. The last point deserves separate consideration. If you have an ISO image, you should open it with any archiver and then unpack it. 
The next step is to specify which flash drive should become bootable. Be sure to take into account the fact that this will entail the deletion of all data without the possibility of restoring it in the future. It is recommended that you first save important information to your hard drive. The conversion process itself takes some time and you just need to wait.
As you can see from the written guide, creating a bootable Windows XP USB flash drive using WinToFlash is not a problem. The application provides two main modes for performing this task. The wizard guides the user and is a classic approach. Advanced mode allows you to set certain parameters. For example, this includes choosing the type of bootloader, specifying the correction of some errors, and more. If this doesn't mean anything to you, you don't need to use the advanced mode.
You can download the program on the official website of the developer //wintoflash.com/home/ru/
Creating a bootable USB flash drive using - WinSetupFromUSB
The WinSetupFromUSB program is quite popular when creating bootable flash drives. It is free software and offers a simple process to complete the task. This application can be used for a wide range of purposes. 
Let's take a closer look at the process:
- The flash drive must be inserted into the USB port of the device and run the program.
- You need to specify the path to the flash drive. If it is the only connected storage device, it will already be set by default. When the location is specified, Bootice is clicked.
- A special Bootice window appears, where you need to click “Perform format”. There will be several options to choose from, among which you need to specify USB-HDD mode (Single Partition). A formatting message appears and must be confirmed. As in the previous case, it is recommended to save all important entries in advance.
- When formatting is completed, you need to click “Process MBR”, where you select the “GRuB for DOS” item and click the “Install / Config” button. When the process is complete, Bootice can be closed.
- Now you need to specify where the Windows XP operating system files will come from. As with the previous method, there are several approaches, but the principle of action remains the same. When the location is specified, the "Go" button is pressed and waits until the assigned task is completed.
The main advantage of WinSetupFromUSB is its in-depth approach, which allows you to use a lot of functionality. The program is great for advanced users.
Preparing the hard drive during Windows XP installation
Before you begin the process of installing Windows XP on your computer's hard drive, you need to prepare it. It should be understood that installing several operating systems on one logical drive is impossible, since in this case none of the systems will be able to work correctly. Therefore, before starting the installation, it is necessary to format the HDD partition on which we will install.
We launch from the previously created bootable flash drive, 
After which the message “Installing Windows XP Professional” will appear on the monitor. At this time, the process of downloading drivers that are necessary for the OS installation program to work occurs. 
After this, a window appears that offers you to choose one of several options for continuing work. We need to start installing Windows XP, so press the Enter key and agree with the first point.

We read the license agreement from Microsoft and agree to it by pressing the F8 key. 
After this, we see a window in which we are asked to restore the previous version of Windows. You will see this message only if you already have one of the versions of Windows XP installed on your computer. In any case, we recommend not performing a system restore, but proceeding with installing a new version, since only this option can solve all problems and ensure stable and reliable operation of the computer. To do this, press the Esc key. 
Now the installer shows us a list of logical partitions on the hard drive. It is recommended to install the new version of Windows XP on the same partition in which the old version was previously installed, usually drive C. Select this partition and press the Enter key. 
Now we have to select the type of file system that will be created on the logical drive after formatting. For modern computers, in most cases, the NTFS file system is best suited, so select “Format partition in NTFS” and press the Enter key. 
After this, the installation program will display a window warning that all information from this partition of the hard drive will be deleted during formatting. If you have transferred all the important information to other sections in advance, feel free to press the F key.
The formatting process begins, which can take quite a long time, depending on the size of the logical drive. 
Once the formatting process is complete, Setup will automatically begin copying Windows XP files to your computer. 
After this, the computer will automatically restart. The system will start booting from the computer's hard drive and the Windows XP installation process will begin in graphical mode.
The Windows XP installation process - the main stage
This section will directly answer the question “How to install Windows XP.” This information is absolutely identical both for the process of installing Windows XP from a CD, and for installing Windows XP from a flash drive on a laptop. The “Information Collection”, “Dynamic Update” and “Preparing for Installation” stages occur without our participation. After this, we are asked to configure the language, regional standards for displaying numbers and currency units. To do this, click on the “Configure” button in the “Location” section. Select your country from the drop-down menu and click OK. After that, click on the “Customize” button again, but this time in the “Language” section. In the first drop-down menu we can select the language that will be used by default when the computer boots. Below you can add input languages by clicking on the “Add” button (by default, two languages are available, Russian and English). If we click on the “Keyboard Options” button, we will be taken to a menu where we can set a key to disable Caps Lock mode, as well as change the keyboard shortcut to switch the keyboard layout. After completing the language settings, click “Next” and move on to the next window. 
Here we are asked to enter our own name and the name of the organization. Enter absolutely any data and click “Next”. 
Now you need to enter the 25-character license key for your copy of Windows. This key is located on the box if you are using a licensed copy. In the case of pirated products, it must be in a text file. Enter this key, check that the entry is correct and click the “Next” button.

After this, a window appears for setting the computer name and password for a user with administrator rights. If you work on a home computer, you independently choose the name that will later be assigned to your PC on your home network. If you are working on a corporate computer, check with your network administrator. The administrator password that you set in this same window should be remembered or written down, since it will be needed every time you start Windows. 
In the next window we are given the opportunity to set the date and time. Select the desired settings and click “Next”.

After this, go to the “Configure network settings” window. It is best to skip the local network setup at this stage and do it later, after the installation is complete. To do this, select “Regular settings” and click the “Next” button. 
Leave the work group unchanged "WORKGROUP" and click next. 
After this, system files are copied to your computer's hard drive. Wait until the installation process completes, after which Windows XP will start for the first time. If automatic monitor setup starts at this time, wait until it finishes and click OK. 
In this window, left-click on “OK” 
After this we will see an animated Windows XP welcome window. 
After this, a window appears asking you to enable Windows automatic updates. Based on experience, it should be noted that it is better to leave automatic updates disabled. And update the system manually.

Next, we will be asked to set up an Internet connection and activate a copy of the OS. You can skip this step for now. 
Are you ready to register with Microsoft? To this question we answer “No, some other time” and click next.

The next window prompts you to enter your account name, as well as the names of other users who will also work on this computer. Note that accounts named Administrator and Guest were created during the OS installation process. 
At this point, the installation of Windows XP is complete, click the “Finish” button and enjoy the clean operating system.